What makes a great tack? It’s simple: whatever technique allows you to maintain the optimal combination of the best VMG during the tack and the fastest acceleration out of the tack. That’s easy to say but tough to do well. In my Interclub dinghy days, in light air, we often looked for opportunities to start a tacking duel with nearby competitors. It didn’t matter which way each boat was going; all we wanted to do was grind them down—keep tacking, gaining on every tack. Eventually, someone prevailed. That’s the power of being able to tack really well, and although you may seldom be in that type of tacking combat, tacking better than nearby boats can give you that extra couple of boat lengths that make the difference between rounding just ahead of a pack or rounding in the middle of it.
There always needs to be a reason to tack. It can be for a windshift, to find more wind, to head toward an advantaged side of the racecourse, to avoid a starboard tacker, being at or near the layline, for a navigational hazard such as a shoreline, shoal or oncoming freighter, to cover the fleet, to consolidate on a gain or minimize a loss, and even to take a flyer if in poor position. When in doubt, don’t tack. Many racers, including myself, tack too much—it’s a fatal flaw.
A few of my rules: Don’t tack in lulls or anytime tacking will put you into bad air. It’s better to tack in puffs, unless in heavy air and you’re worried about wiping out. When the windspeed is variable with gusts and lulls, you will lose much less by tacking in a gust rather than trying to accelerate in the light air of a lull after the tack. In oscillating winds, with several shifts per beat, generally tack anytime you are headed below your mean (average) compass heading for the tack you are on. There will be times when you should “eat a header” to get a bit deeper into the new shift, and there will be other times when you may tack off a small lift to find a larger shift or more wind.
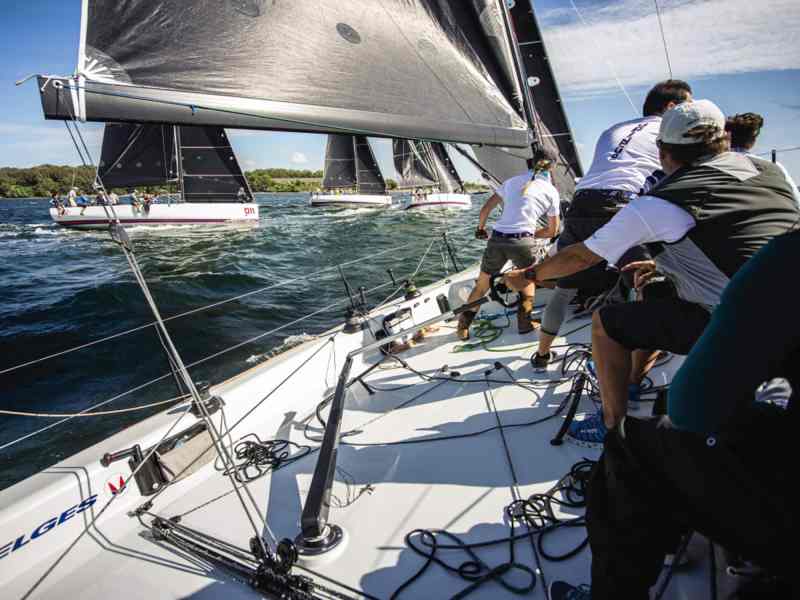
For any given beat, study and understand the optimal number of tacks that leg requires to be sailed perfectly in the absence of other boats. Only one person should decide exactly where to tack—either the helmsperson or the tactician. And once that decision has been made, communication with the crew and the selection of the time and place to tack is critical, especially in a seaway. A well-trained crew is always ready to tack, which means sheets are always cleared, winches loaded, etc. I train the crew not to move until the countdown commences, “3, 2, 1, helm’s over.”
In a seaway, the tack must be done in harmony with the wave pattern. Choose an area or sequence of smaller waves. Done right, the wave pattern will assist the tack. Get the bow of the boat past head to wind as the next wave approaches so that the new wave helps push the bow down to course, requiring less rudder movement. When Tucker Edmondson and I were learning to sail 505s in our first big event—the 1979 World Championships in Durban, South Africa—we developed a technique for tacking in huge ocean waves that worked well: We’d finish the tack and accelerate on the top of the wave crest, filling the sails there instead of in the trough of the wave, where there was less wind.
Steering well through a tack is a bit like the Goldilocks story—you need to turn not too quickly, not too slowly, but just right. Of course, the million-dollar question is, what’s just right? The speed of the turn differs with every type of boat, every wind velocity and, as was the case for us at the 505 Worlds, every sea condition. Those are a lot of variables.
A great tack involves picking up as much VMG as possible during the first segment of the tack, and landing on the ideal exit angle for maximum acceleration as the tack is completed. This all requires good steering, crew coordination and sail trim. Broadly stated, a large, heavy keelboat should be tacked slower, and a light, planing dinghy should be tacked quickly. The fastest turn should be made in medium air and choppy seas, while the slower turn is good for flat water, lighter winds, and when overpowered in heavy winds. In overpowered conditions, the boat’s exit from the turn must be done slowly so as not to end up heeling excessively once on the new tack. No matter what, be sure not to overturn and end up on a course too low of your desired exit angle.
RELATED: Sailboat Racing Tips: Rules at the Start
Because most boats carry some windward helm or rudder angle, begin the tack by slowly moving the tiller or wheel to centerline and gliding the boat up toward head to wind. It’s through this first segment of the tack that you gain maximum VMG, so the longer you can maintain the boat’s momentum, the more VMG you’ll gain. However, that VMG gain comes with an associated loss of speed, which can be measured by the minimum boatspeed reached at the end of the tack as the acceleration segment begins. Have your crew watch the speedo or use a recording instrument, and you’ll get a good sense for that. How do you know when to end the glide and turn the boat through head to wind? Practice, experience, measurement and analysis, of course. I use an increasing rate of turn until just past head to wind and as the sails begin to fill on the new tack.
How you steer the next segment of the tack, from just past head to wind until you get to your acceleration angle, a few degrees below close-hauled, is critical. Just after passing head to wind, the speed of the tack, and therefore the degree of rudder angle, gradually increases—more rudder angle and a faster turn. From there, the next step is to land right on the exit angle. The location of that angle varies depending on the type of boat. You’re looking for the point where you most rapidly accelerate to the speed you were sailing before tacking. Finding the exit angle for your boat will take a lot of practice tacks. As you do them, note your target and actual speeds, the bottom (or slowest speed) during the tack, and how long it takes to accelerate back to full speed once on the new tack. As you approach the exit angle, the speed of the tack should slow, which means you’ll gradually reduce rudder angle. With an overlapping genoa, you might even want to pause the tack once the genoa is past the leeward shrouds. That allows the crew to trim on the genoa before it really loads up.
Trimming nonoverlapping jibs through a tack requires more finesse, and I’ve found that only the best trimmers do it right. As the boat turns up into the wind, the old leeward sheet is readied to ease. That might involve reducing the number of wraps on the winch, or uncleating the sheet so it is ready to ease freely. Don’t allow the old sheet to ease. During the tack, the jib is backed just a tiny amount, which accomplishes two things. First, it helps turn the boat through the wind and down onto the new tack. And second, it helps blow the jib around. Without backing, the tack will be slow. However, too much backing and the jib will reduce the forward speed of the boat like a brake. The moment it backs, immediately let the old sheet go. There are exceptions to this, such as when approaching the windward mark on the port tack layline. Then, allowing the jib to back for a couple of seconds helps pull the bow down to the new reaching course to the offset mark, requiring less rudder angle.
Next—and this is super-important—the trimmer of the new sheet must overtrim the new sheet as quickly as possible so that the jib fills on the new tack before the boat reaches its optimal course on the new tack. Once filled on the new tack, the jib provides acceleration and adds lee helm, thus reducing the amount of rudder angle needed to steer the boat down to the exit angle. The overtrim should be as hard as possible. That’s followed by an immediate ease until the boat reaches the exit angle. That ease must be done in harmony with the helmsperson. So, as the boat continues its turn down to the exit angle, the trimmer eases the jib sheet until, as the boat accelerates to its optimal VMG angle and speed, the jib is then trimmed back in to its optimal tension and shape. A big indicator is the telltales will all be flowing. The process sounds easy, but it takes a lot of coordination between the offside trimmer, who eases the old sheet and backs the sail, the new trimmer and the helmsperson. When done correctly, the jib fills on the new tack and literally pulls the bow of the boat down to the desired course, thereby reducing the amount of helm required to turn the boat. Less rudder means less braking, less drag—and greater speed. And that’s what we’re always after.


