BowmansAsymStory2
I’ve been sailing primarily on the J/105 Masquerade for the past six years, and in that time I’ve made every mistake possible (that I know of). Shrimping, big knots, torn spinnakers, you name it. But with each mistake, and each regatta, we’ve developed highly choreographed techniques to managing our asymmetric spinnaker. Fundamental to the success and efficiency of all our maneuvers is clean, consistent bow work, so let’s take a look and see how it’s done.
Start with the setup. On Masquerade, we set up our asymmetric spinnaker for inside jibes, where the clew passes between the spinnaker and the headstay during the jibe, and we launch out of the forward hatch. We use spinnaker sheets that are spliced together; the splice is about 18 inches back from where the sheets are tied to the clew with a bowline. The splice has less drag on the headstay during a jibe than individual sheets tied to the clew. With a single splice, there’s also less weight pulling down on the clew, which is important in light air.
We run the spinnaker sheets outside the lifelines to an aft block and then, as another trick, we run them forward through a stanchion base that’s in line with the mid-boat turning block, which leads the sheet to the cabin top winch. We’ve had the blocks blow up in a big breeze, and having it led through the stanchion base has allowed us to finish the race without compromising our performance too much.
When rigging the spinnaker gear, make sure the sheets, halyard, and the tack-line are led under the jib sheet. The most important tip on rigging for an inside jibe is to “tack down” the lazy spinnaker sheet. By this, I mean we have the tack line running over the top of the weather spinnaker sheet, which is lead around the headstay (for port roundings).
As with a symmetric spinnaker, I have the head between the clew and tack and the spinnaker halyard over the top of the leeward sheet. Next, I tape the halyard to a stanchion, below the lifeline. This keeps the halyard out away from the rig, and the tape will break during the hoist. The last thing I do for the setup is take about 15 feet of the lazy spinnaker sheet and place it on top of the spinnaker in the hatch. This ensures that the weather sheet will be loose during the set.
To set up for an outside jibe, where the clew passes out and around the spinnaker, the tack line will be under the lazy sheet. The biggest issue with the outside jibe is having sheets that are long enough, and not letting the lazy sheet fall over the outboard end of the pole. Many one-design fleets do not allow adding battens or extenders to the pole tip to prevent this from happening, but in open classes, or handicap racing, such devices can help prevent a lazy sheet from going over the bow.
Setting the spinnaker
As we come to the weather mark, the crew is hiking, and if there’s an offset in place, we stay on the rail until the boat flattens on the reach to the offset. Once it’s flat, I open the hatch, go forward, and pull the tack out past the pulpit. As we start to round the offset, I’m pulling the rest of the tack, and the head, out of the hatch (or bag), and as the mastman hoists, I run the luff tape to make sure there are no twists. A twist generally shows up near the head, and by running the tape it can be cleared quickly as it comes out of the hatch.
If your previous drop was questionable, then give yourself a couple of extra seconds to make sure it comes out clean. It is always best to have your mastman and pitman on the same page with you during any maneuver. If they’re watching what’s going on, they can control the speed of the set and allow the bowman to clear a twist or fouled sheet.
The key to having good sets is marking everything. For the tack line, we have a 3-inch-long mark at the jammer. The halyard has a mark showing full hoist, and the pole has a mark to confirm it’s fully extended.
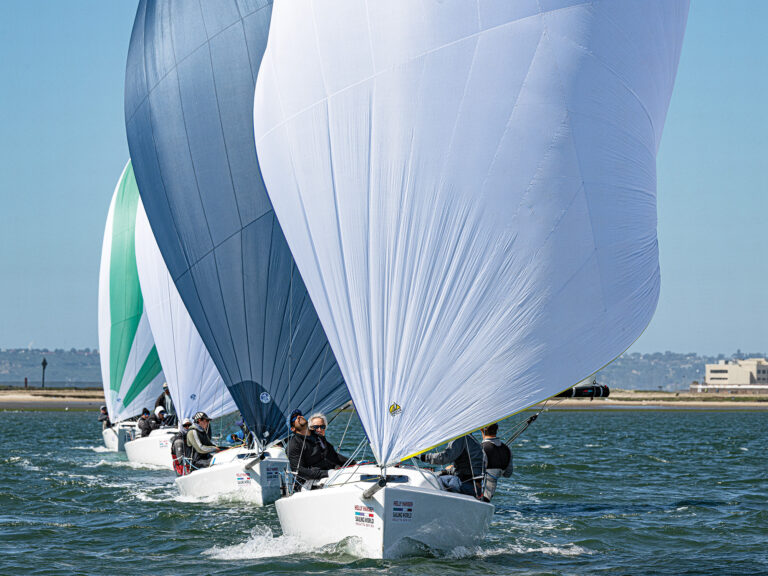
As soon as the spinnaker is clear of the hatch, I go directly to the furling line exiting the drum and furl the jib. An immediate furl allows the spinnaker to fill more quickly. Once the jib is furled, I get ready for a jibe by grabbing the weather sheet, sitting low, and waiting for the call. At this point, take a look back; it’s always fun to see if the spinnaker is up and flying before your transom clears the offset. Make it a goal.
Assisting through the jibe
When the call is made to jibe, I stand up, go forward, and as the boat starts to go through the wind, help the kite through the jibe by pulling aft and down. How hard and fast you need to pull is determined by the wind strength; slow and controlled in the light stuff, fast and furious in the breeze. Kite size also makes a difference because larger kites require more strength in the breeze. On a J/120, with its massive spinnaker, we’ve found that in more than 18 knots, the outside jibe is much easier than muscling the entire thing through an inside jibe. With either jibe, the rate at which the trimmer tails can make or break a good jibe. The trimmer should be tailing the sheet for all he’s worth. The second trimmer simply eases the old sheet, and once the clew is past the headstay, lets the sheet run free (making sure he’s not standing on the tail).
Coordinating the drop
For sets and douses, our team has developed a choreography that has a few of the crew changing positions. The bowman always stays forward, but the spinnaker trimmer, who happens to be one of our bigger guys, bumps the halyard on the set, and helps get the kite down. Our pitman works the middle during the sets and jibes, but moves below to become the sewer man during the douses.
The second trimmer takes the spinnaker sheet on the set, then passes it to the trimmer, who is already on the weather rail and in position to trim. The hardest part of this crew-switch technique is the second trimmer’s multitasking. Before the drop, he needs to preset his jib, take the spin sheet from the trimmer, and then become the pitman where he drops the halyard and releases the tack line.
As we get ready to douse, I confirm whether the douse will be a standard weather strip, or a leeward drop. When it’s a weather strip, I call to the pit for, “Sheet, tack, halyard,” which reminds them the order of release. We put two guys on the bow and one in the pit for most of our douses. When the call is made to drop, the trimmer dumps the sheet, and as I start to pull the weather sheet to the foredeck, he dumps the tack line. This does two things: it unloads the kite and allows it to come down clew first, which sets the kite up properly for the next hoist.
It’s important to control the halyard drop so that the kite is brought around to the weather side. The forward bowman concentrates on gathering the foot, making sure the entire length of it is on board, and the aft bowman gathers the belly (running a leech tape as he does so). The sewer grabs the belly and pulls it through the hatch (also running a leech tape to make sure it’s coming in clean).
The entire maneuver takes 10 to 15 seconds, so the added weight on the bow is worth the efficiency and success rate in any wind condition. With a leeward drop we also have two guys on deck, but this time my call to the pit is to, “hold the tack and pole, blow the sheet and halyard.” The important thing here is to keep the foot stretched flat until the bulk of the spinnaker is under control; once it is, the sheet can be blown and the pitman controls the halyard drop.


